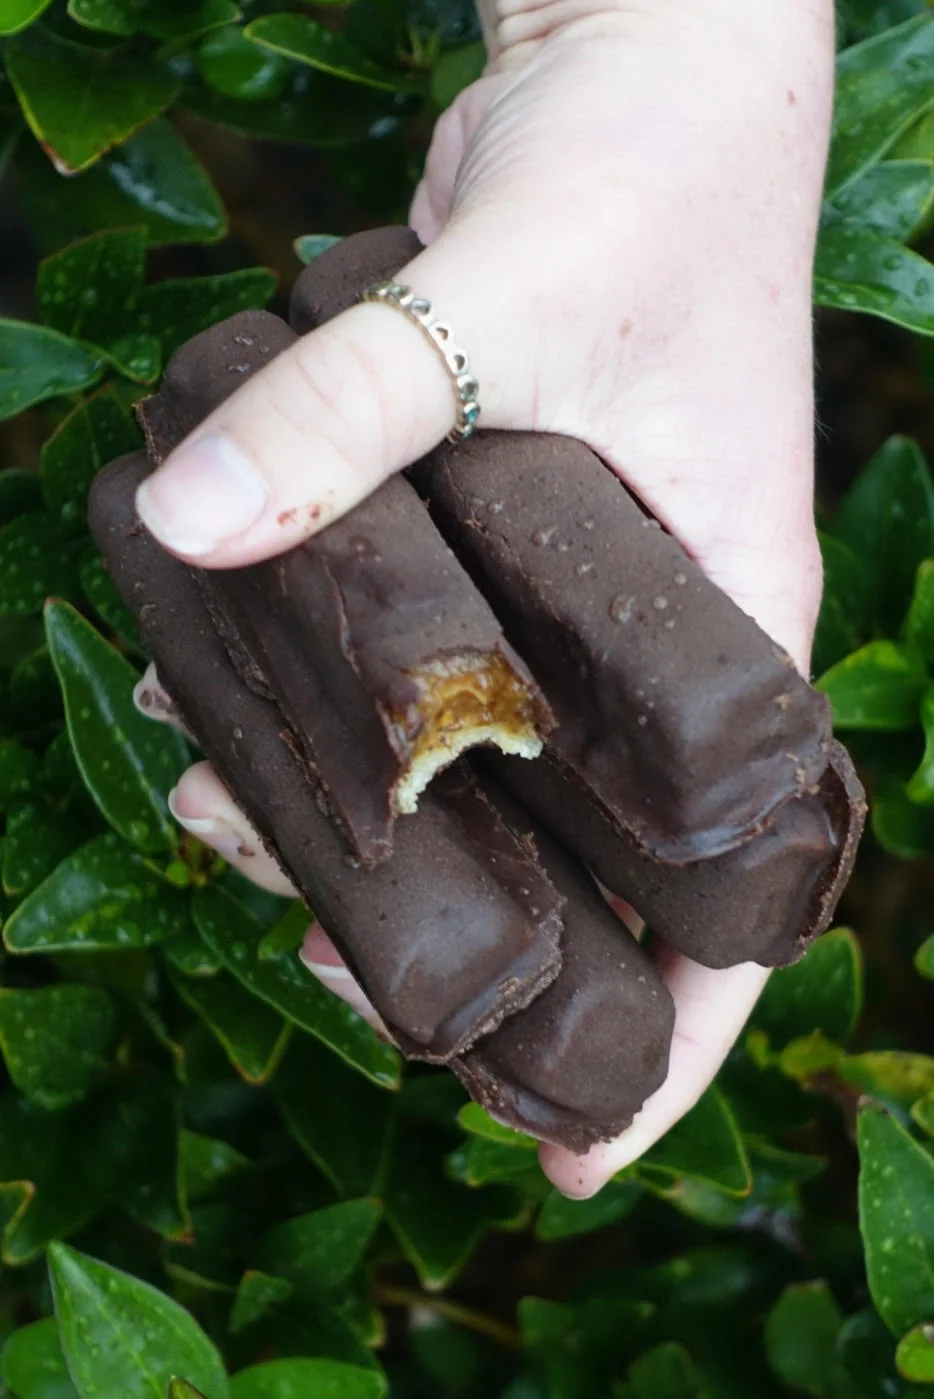
In my soft, squidgy, and undeniably food-centric mind, there is no high form of anticipation than that induced by the crinkling of a shiny chocolate wrapper under eager, flimsy fingertips. There's just something about the glinting silver foil that brings out the inner Charlie Bucket in me - the name 'Whipple Scrumptious Fudgemallow Delight' alone, inked onto the yellowed, crumpled pages of my favourite childhood novel, was enough to send my well-exercised salivary glands into overdrive.
Unfortunately, 'Twix' doesn't quite have the same ring to it, but I do still get cravings for the crispy chocolate-covered caramel bar every now and then thanks to strategically placed candy stands and the nibbling schoolgirls I stroll past on my way home from university (that's right, I've officially been promoted from squirming foetus to adult-ish blob). That's exactly why I invented these visually identical (and admittedly gustatorily dissimilar, but equally as delicious) vegan versions of my old favourite!
Originally intended for my upcoming ebook, I decided to cave in and share them early because I don't know how you are all functioning without one of these in your pockets at all times. With a chewy vanilla cookie base, a slab of gooey caramel, and multiple layers of crackling dark chocolate, I dare say these things couldn't ever be anything other than a whipple-scrumptious-fudgemallow-DELIGHT!
This recipe will make approximately 6-8 individual bars, depending on how thick you make them.
INGREDIENTS
VANILLA COOKIE BASE
1/2 cup of cashew nuts
1/2 cup of ground almonds
1/4 cup of brown rice syrup
1 teaspoon of vanilla bean paste or extract
Pinch of pink Himalayan salt
GOOEY CARAMEL
1/2 cup of pitted dates
1/4 cup of peanut butter
1-2 tablespoons of filtered water
Pinch of pink Himalayan salt
DARK CHOCOLATE SHELL
1/3 cup of raw virgin coconut oil
2 tablespoons of raw cacao butter
1/3 cup raw cacao powder
1/4 cup of pure maple syrup
1 teaspoon of vanilla bean paste or extract
METHOD
- Prepare a small brownie pan by lining it with a piece of parchment paper. If you find it sliding about too much, you can lightly grease the tin with coconut oil which will act as a slight adhesive and hold the paper in place. Please note that this recipe will make twelve small chocolate bars.
- First make the vanilla cookie base by placing the cashew nuts and ground almonds in the bowl of a food processor. Pulse the three until a coarse, dry crumb is achieved, before scooping in the brown rice syrup, vanilla, and salt, and blitzing once more until well combined and a consistent texture.
- Press this vanilla mixture into the base of the brownie pan, ensuring that you have spread it evenly and left no gaps at the bottom (which has the potential to ruin the rectangular appearance of the final product). I like to use wet fingers, or the back of a metal dessert spoon. Once sufficiently flattened, slide into the freezer and allow to set whilst you set about readying the other components.
- Next make the gooey caramel by placing the pitted dates in a bowl and covering them with warm water. Allow these to soak for ten minutes, or completely soft, then drain, squish, and place in the bowl of a food processor. Add the peanut butter, water, and salt, and blend continuously for around 2 minutes or until a smooth, sticky consistency is reached. You may need to stop the processor and scrape the sides down every once in a while as this is a rather sticky mixture.
- Take the vanilla base out of the freezer and check if it’s solid – if so, scoop the date caramel on top and proceed to smear evenly atop the creamy white cookie base. Again, I find using wet fingers or a hot spoon the most efficient at this task. Keep in mind that this is fiddly work, but the end result is most certainly worth the tugging and sculpting! Once you’ve wrestled it into an even layer, return to the freezer for around two hours, or until almost completely solidified.
- Once you’ve reached this stage, use a hot, clean knife to cut individual finger-sized sticks of cookie caramel slice. You’ll need to wipe the blade clean between each slice to avoid any sticking and ruin the rectangular aesthetic. Return these sticks to the freezer on a fresh piece of parchment paper atop a wide plate to set whilst you get about making the chocolate.
- To make the chocolate, heat the coconut oil and cacao butter in a small saucepan over a low heat until just melted. Once liquefied, add the cacao powder, maple syrup, and vanilla, and whisk vigorously until smooth and glossy. Pour this molten chocolate into a wide dish, and prepare for dipping!
- There are many ways of coating a bar in chocolate, but my personal favourite is to simply get in there with mucky hands and do it myself, one by one. I cradle the bar in my fingertips, baptize it in the tepid chocolate liquid until an even layer forms, then place back on the parchment paper and repeat with the others. A quick flash in the freezer, another dip, freezer, dip, and one last time in the freezer will leave you with the most luxuriously crisp and shiny twix bars you’ve ever had. As they say, if you want it done right, do it yourself! You can store these bars in the freezer in an airtight container for up to a week before they start losing their lovely texture and shine (although they’ll still taste wonderful).
NOTE: If you are allergic to nuts, feel free to substitute the nuts for sunflower seeds, and nut butter for tahini or sunflower butter. The texture, consistency, and overall taste will be altered, but you’ll be left with something equally as tasty!

